Arizer Solo 3 Settings Guide: Best Temperatures, Session and On-Demand Modes, Eco Charging and Firmware
The Arizer Solo 3 V2.0 covers 50 to 220 °C (122 to 428 °F). It has two modes, session and on-demand, and three editable presets that show 180, 200 and 220 °C in Arizer's manual. A sensible place to start is the middle preset at 200 °C, then move in small steps: lower temperatures usually bring out lighter, flavor-focused vapor and higher ones give denser vapor. This guide explains each mode, the settings menu, Eco Charging and the firmware notes, all from Arizer's own documents.
If you want a general temperature primer for any device, read Finding the Right Temperature for Flavor and Efficiency. For the device itself, see our Solo 3 V2.0 review and the Arizer hub.
- Temperature range and presets
- Session mode
- On-demand mode
- The settings menu
- Eco Charging and battery
- Firmware notes
- Stem length and temperature

1. Temperature Range and Presets
The specifications on our Arizer Solo 3 V2.0 page give a temperature range of 122 °F / 50 °C to 428 °F / 220 °C, with precise and preset controls. Arizer describes a hybrid heater, 80% convection and 20% conduction, with a heat-up of 5 to 15 seconds. Temperature can be changed in 1° steps, or 10° steps if you hold the button, and there are three programmable presets.
| Setting | What Arizer's manual shows |
|---|---|
| Temperature range | 50 to 220 °C (Celsius or Fahrenheit display) |
| Fine adjust | Press UP or DOWN for 1°, hold for 10° (session mode) |
| Presets | Three, shown as 180, 200 and 220 °C; edit any of them |
| Modes | Session and on-demand |
Which temperature suits you? There is no single best number, because it depends on the herb, the stem and your taste. As a rule, start near 180 to 200 °C, take a few draws, and move up or down by 5 to 10 degrees. Lower settings tend to be lighter and more flavorful, higher settings produce thicker vapor. Arizer's manual also advises lower temperature settings to conserve battery life.
2. Session Mode
Session mode heats to your set temperature and holds it. Arizer's manual describes it as the mode for a relaxed, flavorful session. Press UP or DOWN to change temperature by 1°, or hold for 10°. A double press of the center button opens the preset screen, where LEFT and RIGHT choose a preset and EDIT changes it. A quick double press of LEFT or RIGHT switches presets at any time.
Once a session is running, press the center button to open the session toggle and add 5 minutes with +5 MIN. This does not change your Auto-Off setting for future sessions. Arizer's Solo III support page says the device begins heating automatically in session mode, while in on-demand mode you press UP to start heating.
3. On-Demand Mode
On-demand mode is built for quick draws, including through a water pipe. Press UP to heat to the current preset. When all the bars turn yellow the device is heated and ready to draw. Press DOWN to cancel heating. As the bars turn from yellow to white, you are in your heat time, the period the Solo 3 holds your preset temperature. When they fade from white to grey, you are in the cooldown, and you can keep drawing until the bars are all grey and vapor stops.
According to the current manual, the default heat time is 10 seconds and it is edited in the preset screen. Select EDIT, use LEFT and RIGHT to switch between TEMP and HEAT TIME, then UP and DOWN to adjust. Older instructions on Arizer's site mention a 15-second default and a draw-time setting of 5 to 25 seconds in the settings menu, so the exact steps can depend on your firmware. Use your device's menu and the manual that came in the box when in doubt.
4. The Settings Menu
Hold the RIGHT button to open the settings, use LEFT and RIGHT to move, press the center button to select, then UP and DOWN to change a value. Use BACK to leave. The manual lists these options:
- Units: Celsius or Fahrenheit (session mode).
- Notifications: ALL (a beep on each press and two beeps at temperature), TEMPERATURE (two beeps at temperature) or OFF.
- Volume: low, medium or high for the beeps.
- Brightness: low, medium or high.
- Inversion: turns the control and display inversion on or off. Our product page notes the screen flips automatically when the device is turned upside down for use with a water pipe and the 14 mm frosted aroma tube.
- Lock: the lock screen is released by pressing LEFT, UP, RIGHT in order, and the lock function can be disabled in settings.
- Auto-Off: 5 to 20 minutes in 1-minute steps for session mode, and 5 to 60 minutes in 5 or 10-minute steps for on-demand mode.
5. Eco Charging and Battery
If your device shows ECO CHARGE above the battery icon while plugged in, Arizer says Eco Charging applies. By default the device charges up to 80% and stops, which is intended to optimize battery longevity. To charge to 100%, press and hold UP while it is connected to power. Charging can also pause when the device is too cold or too hot: LOW TEMP HOLD appears below 3 °C and HIGH TEMP HOLD above 48 °C, and charging resumes after the device returns to range.
The box includes a USB-C charger rated 5 V, 3 A. Arizer quotes up to 3 hours of session use or 100+ on-demand draws per charge, and the manual says typical battery life is around 3 hours depending on your temperature and usage, with about 3 hours for a full charge. It also says you can use the device while charging, but it will not run if the battery is completely drained. Use only official Arizer batteries and chargers, and store the unit around 50% charge if you will not use it for a month or more.
6. Firmware Notes
Arizer publishes Firmware Release Notes on its website. They list three versions: 1.04, the original release; 2.03, which added Eco Charging; and 3.00, which added Heat Mode settings and an improved USB-C PD charging handshake. The heat mode setting lets you choose HIGH for faster heating and stronger extraction, or LOW for longer battery life and more gradual extraction. Arizer's page links operating instructions for each version, so follow those for your device and check which firmware yours is running before expecting a new menu option. Our Solo 3 V2 update article covers the hardware changes.
7. Stem Length and Temperature
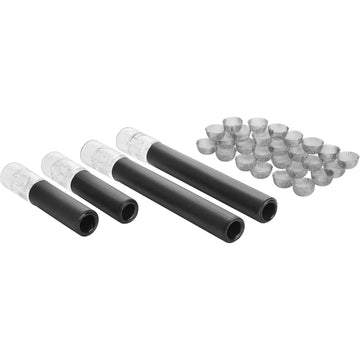
The stem changes how vapor feels at the same setting. Our 110 mm long straight stems give a longer path and more cooling, while the 70 mm short stems are more portable and deliver a more intense feel. Both fit the Solo 3. If you are pairing settings and stems, our Solo 3 stem guide is the place to start, and the Solo accessories collection shows everything that fits.
Final Thoughts
The Solo 3's controls are simple once you know them: pick a mode, set three presets you like and use the settings menu to quiet the beeps, dim the screen and set Auto-Off. Treat temperatures as a starting point, change by small amounts and keep Eco Charging in mind if the battery stops at 80%.